Android Setup in Six Easy Steps
Step 1: Check the Java Development Kit (JDK)
Step 2: Download Android Studio
Step 3: Download the latest SDK tools and platforms
Step 4: Setup your Android Device: enable developer options and debugging
Step 5: Locate your micro-USB and connect your device to your laptop
Step 6: Final check – Is everything working?
Step 1: Check the Java Development Kit (JDK)
You need to have at least version 8 (build 1.8 and above) of the JDK (Java development kit) installed. If your version is greater than or equal to 8 – go to Step 2.
If you do not have the latest version of Java installed, download and install it from Oracle.com. Do this before installing Android studio to make your life easier.
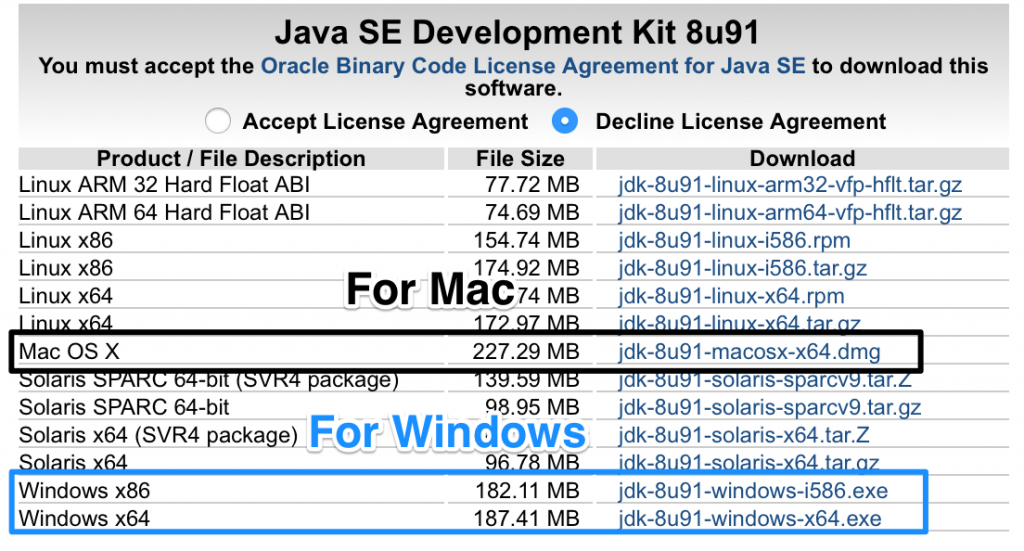
How to check your JDK version on Mac:
Search for terminal using spotlight.

Once you have the Terminal open, type in java -version. You should see some output that mentions a version number, like below.

If you don’t have the JDK installed, your Terminal will tell you command not found or no Java runtime present (see below).
How to check your JDK version on Windows:
Starting with Java 7 Update 40, you can find the Java version through the Windows Start menu.
- Launch the Windows Start menu
- Click on Programs
- Find the Java program listing
- Click About Java to see the Java version
Alternatively, go the Control Panel. Click Java.
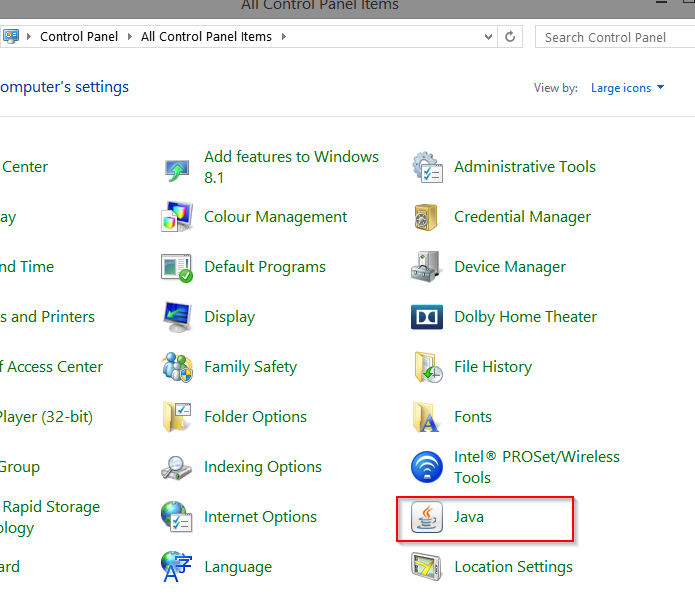
Then check the version under About in the General tab.
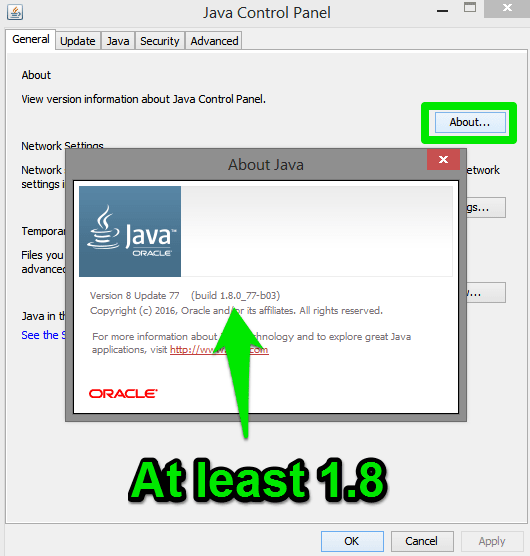
If you need the new JDK, you can download it from Oracle.com. After you install the JDK restart your computer to avoid Windows being confused.
Step 2: Download Android Studio
Head over to the Android Studio page and click the big green button to download the correct version for your Operating System and accept the terms and conditions.
If for some reason Android Studio cannot find your Java SDK, please go to step 1 and make sure that you have the right version (e.g., 64-bit Java).
If you are greeted by a message box asking if you want to import settings, pick the option that says you don’t want to import any previous settings.
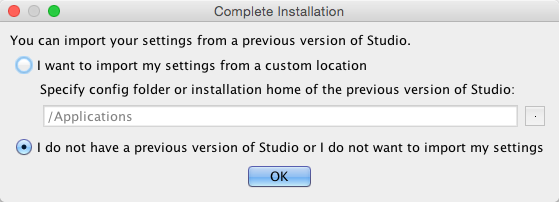
After installing Android Studio, launch the program. You would think that after downloading Android Studio, you’re all done, but unfortunately you need to download some additional components.
Step 3: Download the latest SDK tools and platforms
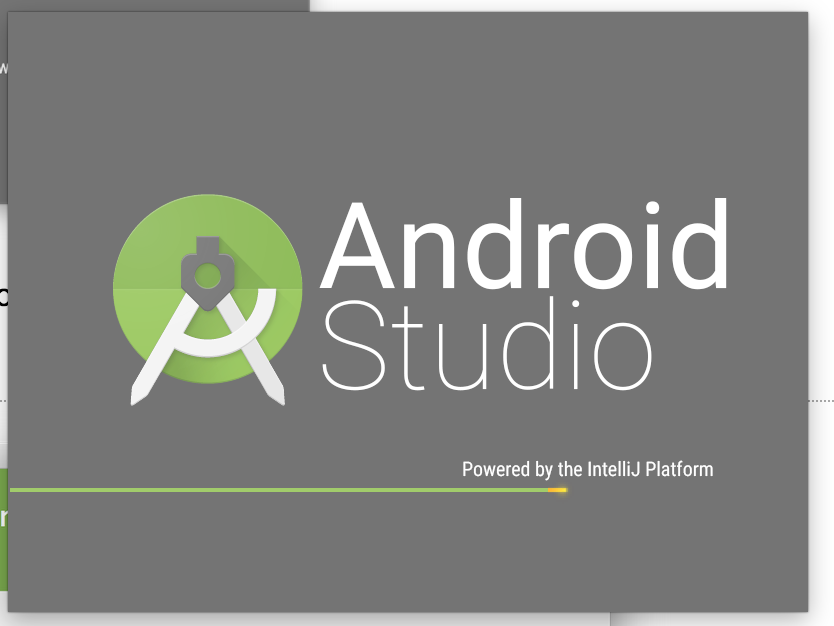
Once Android Studio has finished loading, you’ll be greeted with the Setup Wizard the first time Studio loads.
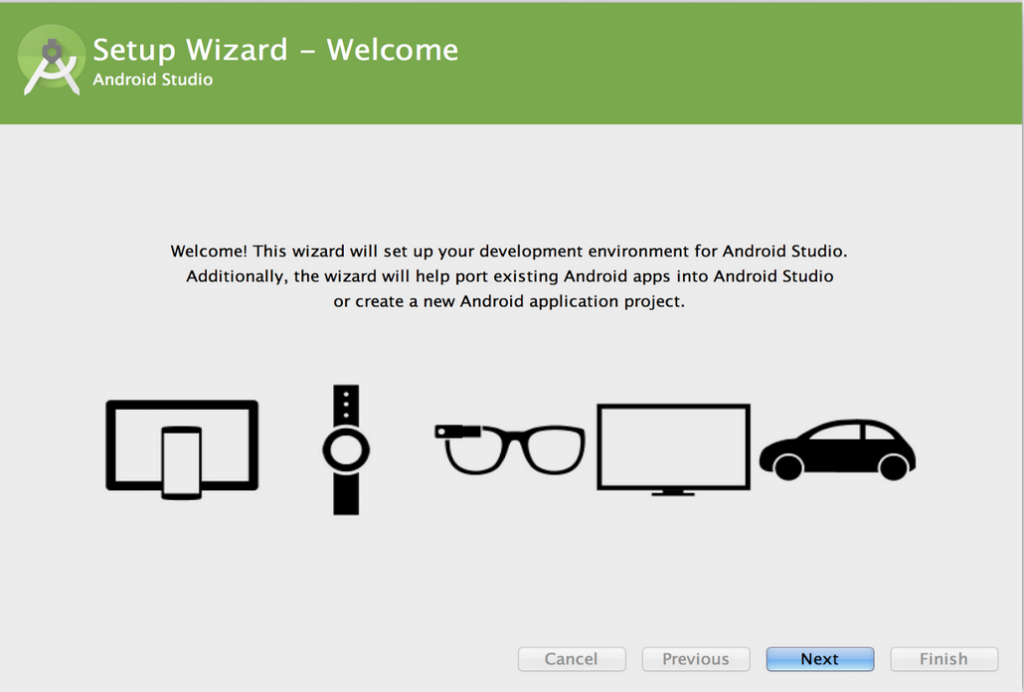
Click Next to move to the next screen. This screen will ask what type of setup you would like. Check “Standard” and click Next again to move to the next screen to accept the licenses for components that will be installed on your computer.
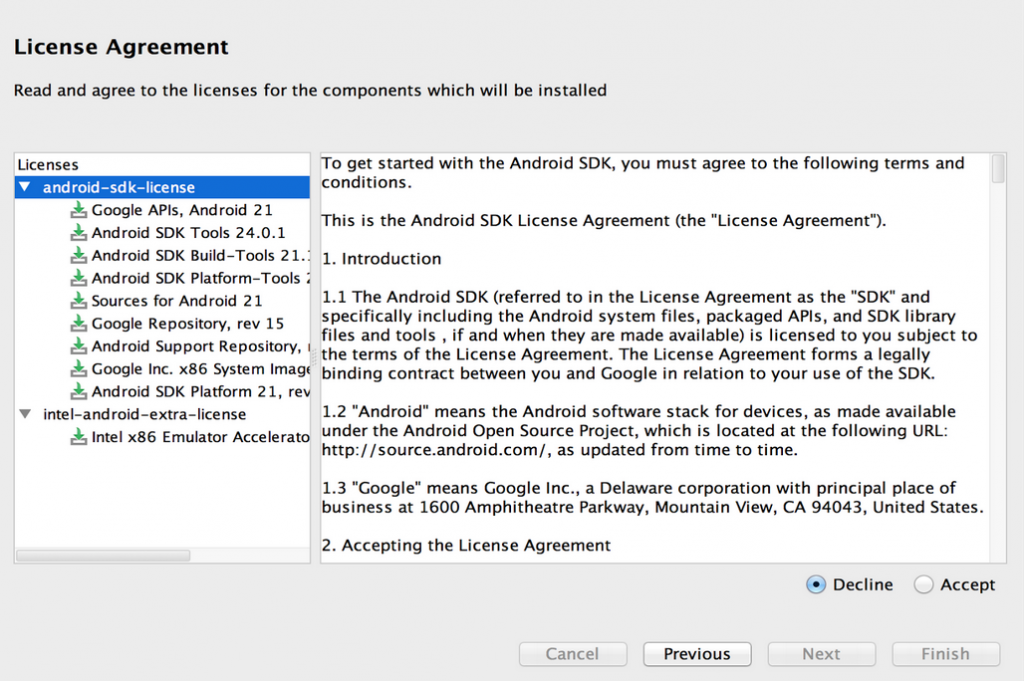
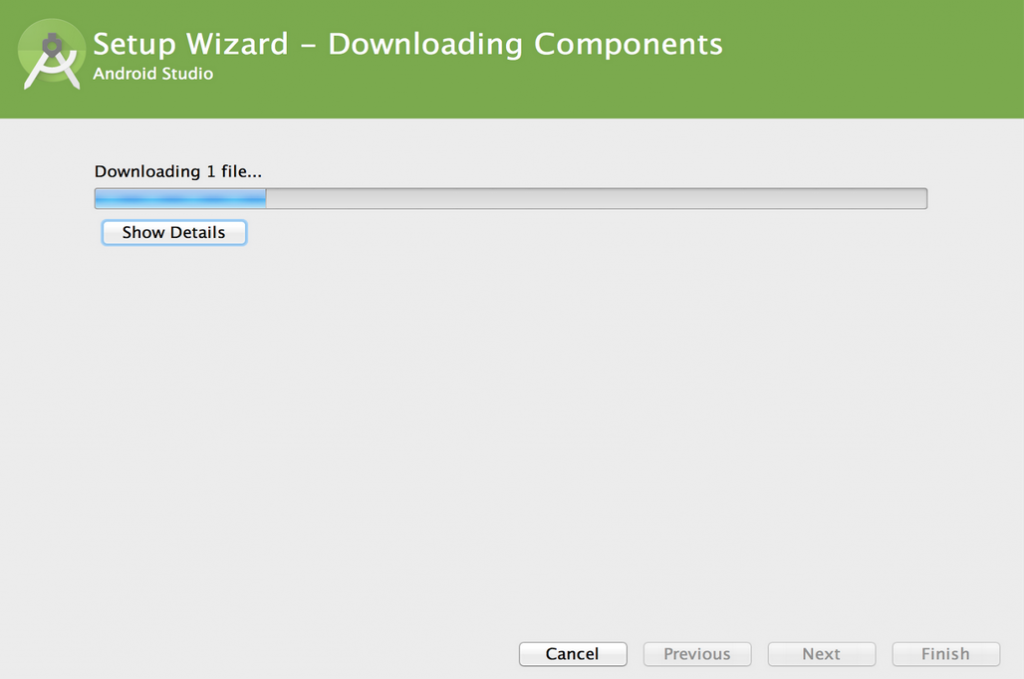
Accept these and click Finish one last time to begin downloading the extra components you will need.
Next you’ll see the Android Studio welcome screen. Check to see if any updates are available and if necessary, follow any instructions to get the latest version. You can check whether any updates are available by clicking check for updates at the bottom of the welcome screen.
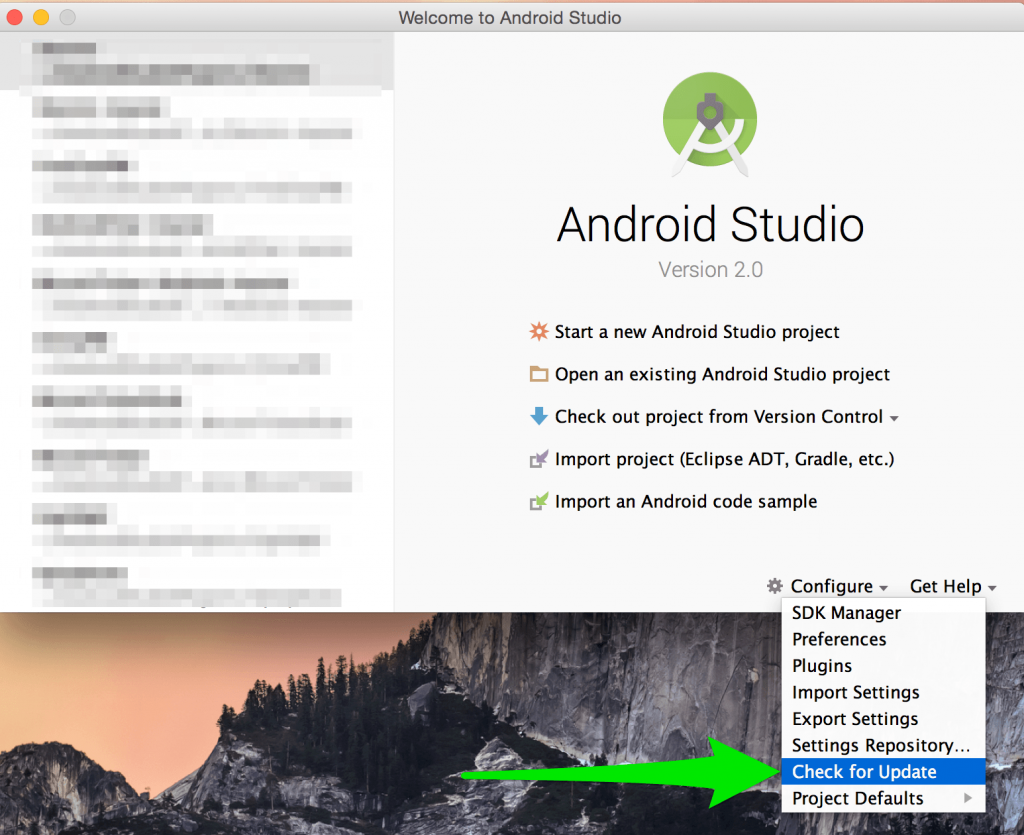
If an update is available you will have a window like this appear. Always choose “Update and Restart”.
Step 4: Setup your Android Device: enable developer options and debugging
You’ll want to run your app on a real device. That way you can show it to your gran and you don’t have to wait for the (slow) emulator to load every time you want to run your app.
Make a note of your device’s Android Version and API level.
| Platform Version | API Level | VERSION_CODE |
| Android 5.1 | 22 | LOLLIPOP_MR1 |
| Android 5.0 | 21 | LOLLIPOP |
| Android 4.4W | 20 | KITKAT_WATCH |
| Android 4.4 | 19 | KITKAT |
| Android 4.3 | 18 | JELLY_BEAN_MR2 |
| Android 4.2, 4.2.2 | 17 | JELLY_BEAN_MR1 |
| Android 4.1, 4.1.1 | 16 | JELLY_BEAN |
| Android 4.0.3, 4.0.4 | 15 | ICE_CREAM_SANDWICH_MR1 |
| Android 4.0, 4.0.1, 4.0.2 | 14 | ICE_CREAM_SANDWICH |
Enabling USB debugging for KitKat and Jelly Bean (4.2 and later):
- Navigate to Settings > About Phone > scroll to the bottom > tap Build number seven (7) times like you want to be part of a secret society. Yep. No joke. You’ll get a short pop-up in the lower area of your display saying that you’re now a developer.
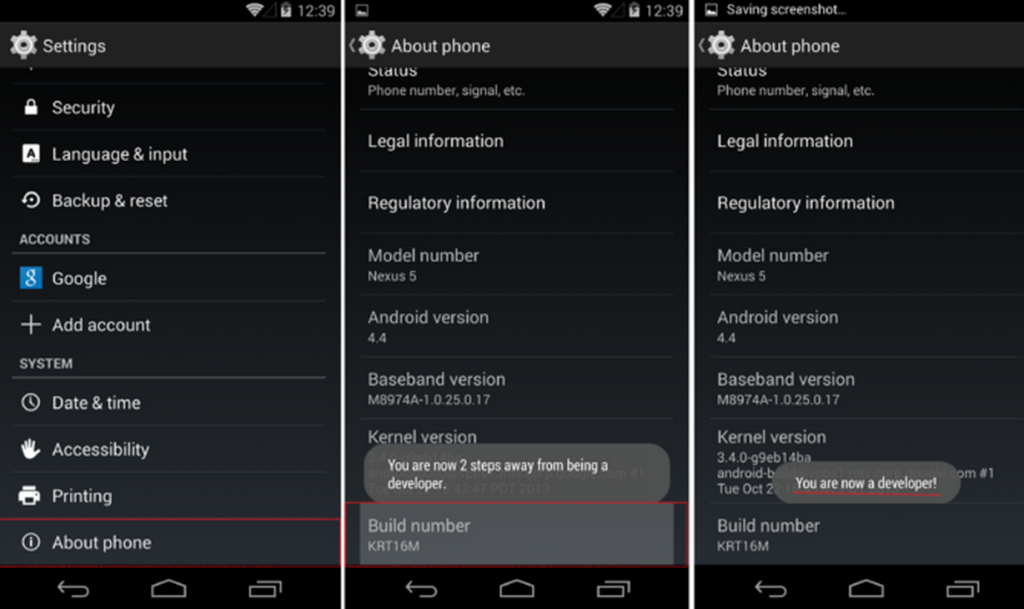
- Go back and now access the Developer options menu, check ‘USB debugging’ and click OK on the prompt.
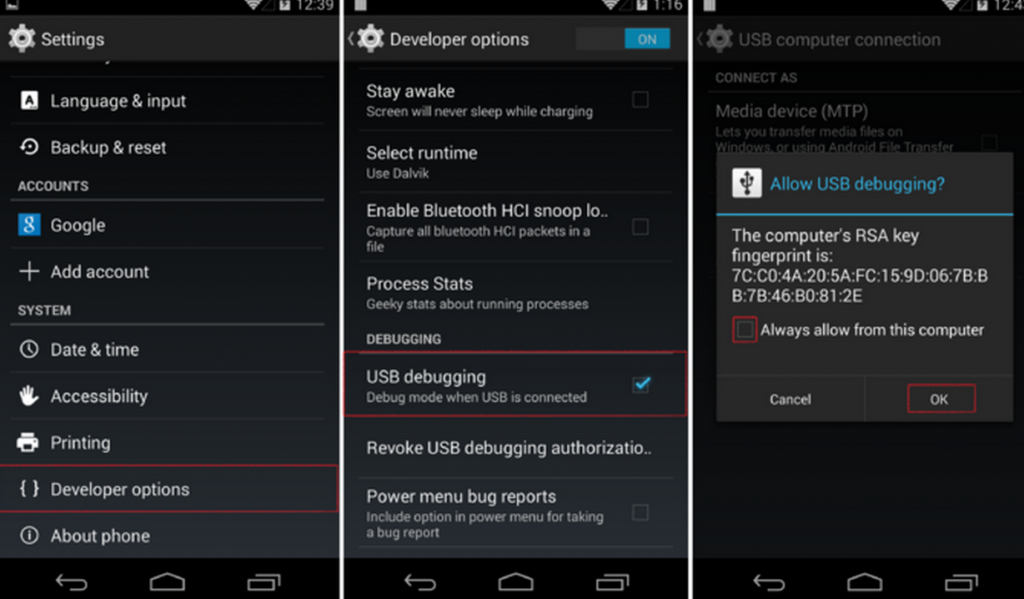
Done! You can now enable and disable USB debugging whenever you want by going into Settings > Developer Options > Debugging > USB debugging
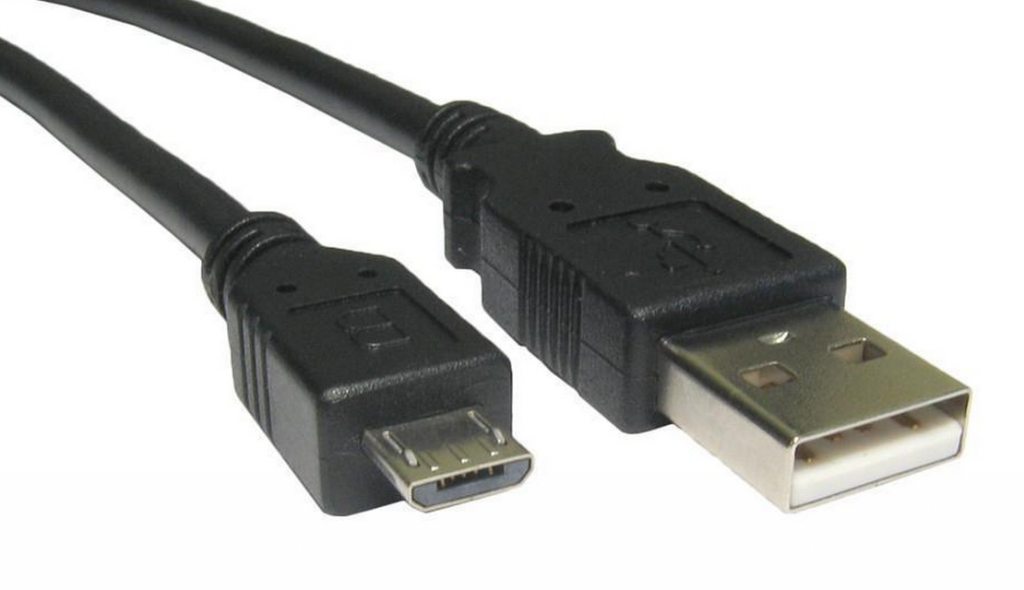
Step 5: Locate your micro-USB and connect your phone to your laptop
Plug your phone into your computer. You should see some symbols come up at the top of your screen informing you that your device recognises that it is plugged in and that it has entered debug mode. Note that the cable must be able to carry data, not just charge the device. The cable supplied by the manufacturer typically works fine.
![]()
Step 6: Final check – Is everything working?
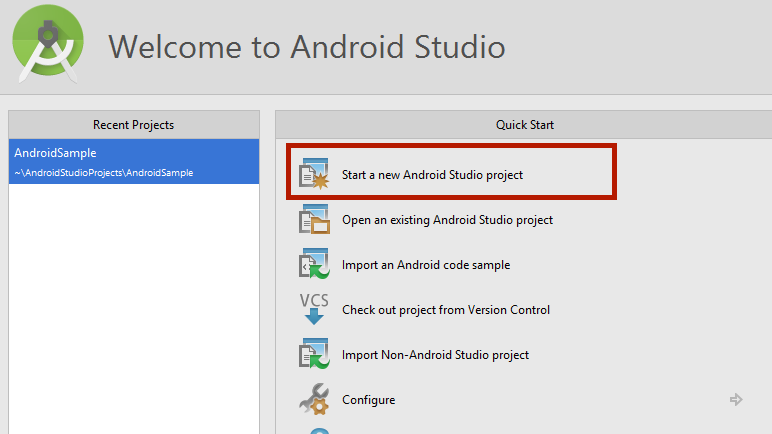
Fire up Android Studio if you have not already. Click Start a new Android Studio Project from the Welcome to Android Studio screen.
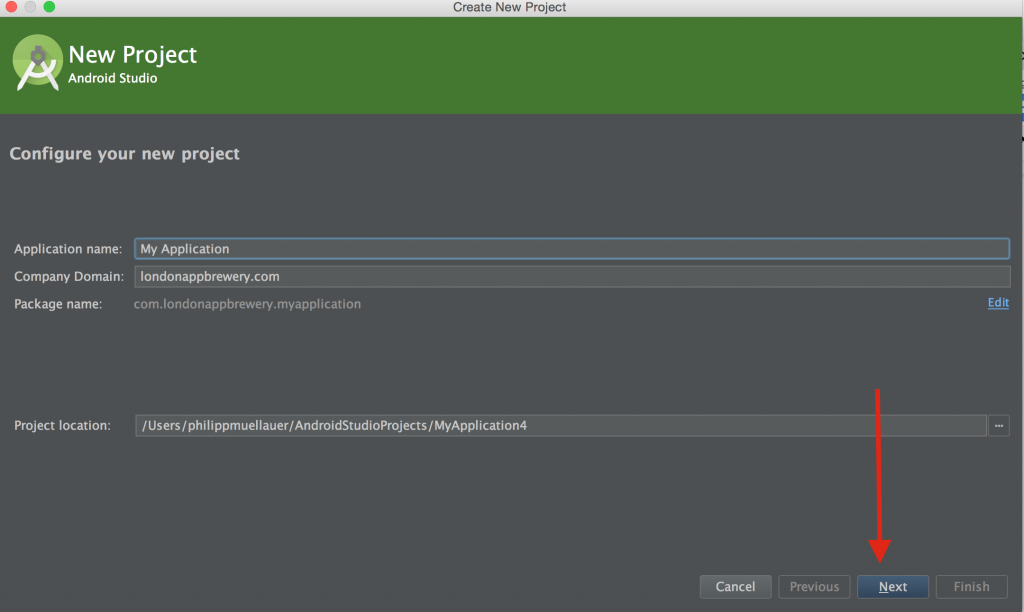
Leave the defaults for Application name and Company Domain by just clicking Next.
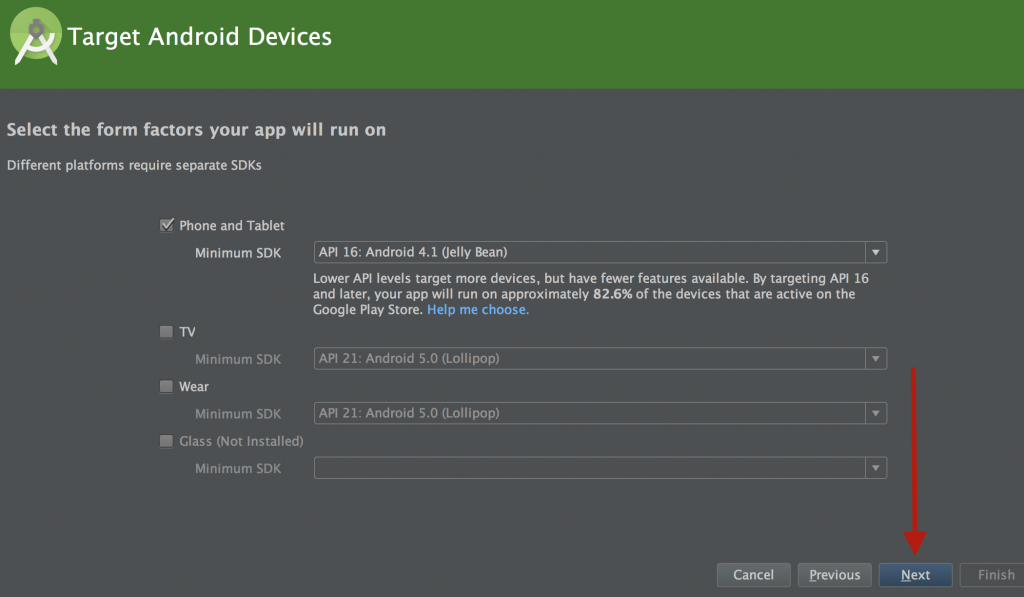
Leave the defaults for the device types and the Minimum SDK and click Next.
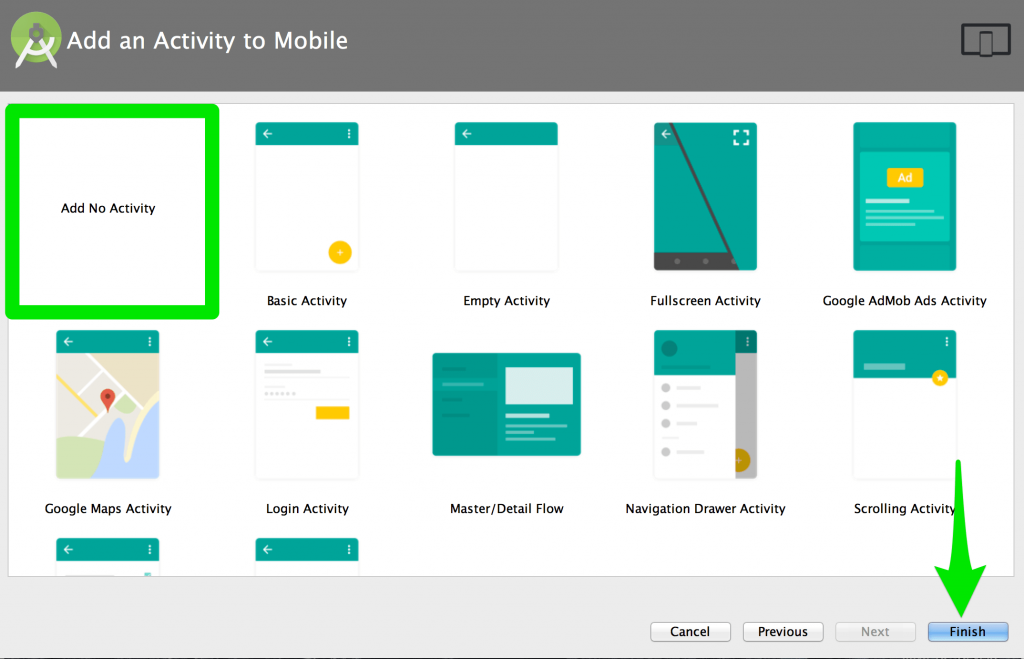
Select Add No Activity and click Finish.
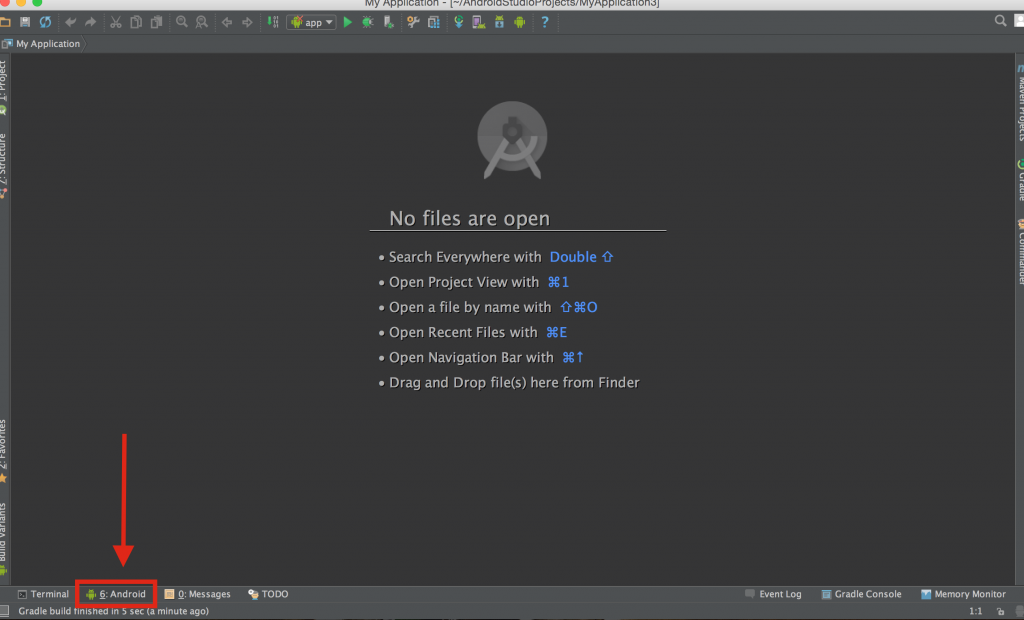
Android Studio should drop you off at the screen below. Click the little green Android icon below to bring up a window at the bottom of the screen.
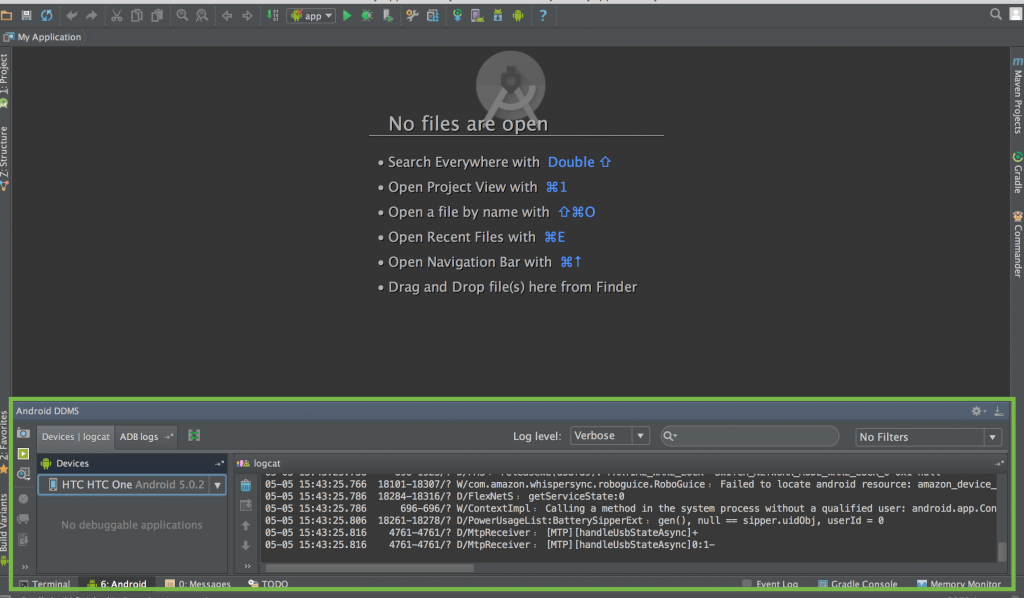
If all is well, you should see your device listed as per below with a bunch of log messages scrolling in the window in the bottom right. That’s it you’re done!
Don’t see the device listed like on the screen below?
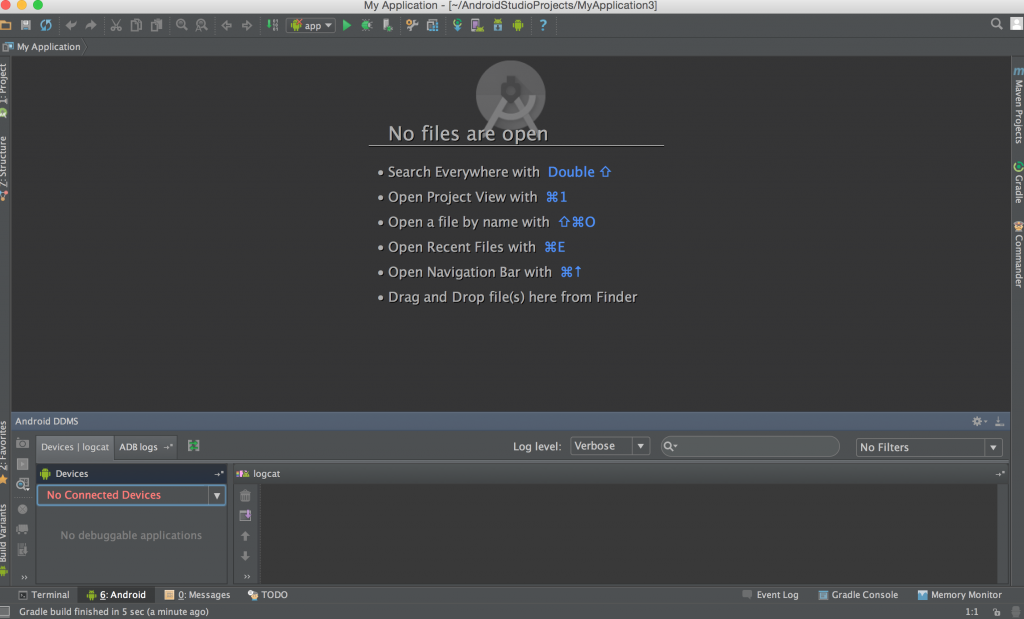
If you don’t see your device connected even though you have it plugged it and debug mode enabled, check the following:
- First, try a different cable. Some cables only charge your device and cannot carry data. Your need a cable that can transfer data.
- It could be a settings thing on your phone. Try and play with the USB connection settings and see if that solves the issue. You can bring up these settings as follows: when your device is connected, drag down from the top of the screen to open the notification window. Touch connected as media device. Change the USB connection options there to “Camera PTP” and see if that solves the issue. Also try switching to the camera option and then back to the media device (MTP) option, to see if Android Studio then picks up the the device.
- Finally, your computer may not have the right driver for your device installed and therefore does not recognise it. If you suspect that you need a driver because Windows has not installed the right one automatically, you can find a list of OEM drivers and instructions on how to install them here. Alternatively, you can download a universal ADB driver here and install it using these instructions. Note that the universal driver will not replace the existing phone driver. You first have to remove it under your Devices settings in the Control Panel.
Finito. You are set to go!
New to Java? Check out our Java tutorial for beginners here.

